Martin Hogg has been busy working on Brett (the small footprint switching layout I’ve discussed in the past). In this new video he’s posted today there’s work going on a-plenty.
First there’s new lighting, fences being pulled down for a repaint, a forest has sprung up, and weeds have taken root around the Co-Op. Most importantly there’s the promise of another video in the near future.
Chris Mears has posted another thought provoking article, this time based on the Claremont and Concord (written about as a project layout in Model Railroader some time ago). This time on a subject close to my heart – real time switching, and how watching how the big-boys do it can give you ideas for slowing down the Nascar switching on your own layout. It’s a great video, and well worth watching in it’s own right. And it follows on from the 5-20-5 minute post. Enjoy
Last year I wrote about the 5-20-5 minute idea and how much I enjoyed running regular, albeit short, operating sessions on my last layout. How much can you do in twenty minutes?
The above video was shot on the Claremont-Concord at West Lebanon. The video runs just under eight minutes in length. It has been edited from its original length but is a terrific record of just how long each movement takes and the pace of working a simple yard. Why not use the video itself as a measure of what can be accomplished in that same period of time on the model?
For the last several years I’ve not had a dedicated modelling space. This means that I have to beg, borrow, and often steal space and time from the family to build, detail and otherwise do anything model.
Chris Mears on his Prince Street blog wrote about this back in 2013.
It is a great article and I thought I’d share it with you here.
I’ve mentioned the “5-20-5” concept before and the more I think about it the more I like it. The idea itself refers to three distinct blocks of time totalling thirty minutes and representing an acheivable length of time to either build a model or operate your model railway. It’s based on things like the length of a typical television program or time we might otherwise spend surfing around on the internet and asked if this might be enough time to invest in this great hobby. We often complain that we simply don’t have the time to build a model or can’t imagine having enough time just sit down and run a train.
The first block of time is about five minutes in length. Take five minutes, get out some tools and a model and get ready to work on it. Obviously building a dozen turnouts might be out of the…
It’s the last day of 2014 and time to change the site theme to make better use of the available screen real estate. I’ve also updated the site logo, and referenced the site back to my well known and sadly still offline site “andrews-trains.fotopic.net”. This I hope will help those still looking for the old fotopic.net site.
Next year
During 2015, with a lot of time on my hands due to being laid-off, down-sized, or right-sized (choose your poison), my aim is to publish a lot more detail on my layout designs, along with suggested operating plans. In addition I expect to be able to complete my Industrial switching layout (ISL) during the year, at least to the point where I can operate the layout, even if all of the scenery and buildings are not complete.
A New Year’s wish
To those of you who read along with my writings, I hope that you had a merry Christmas, and wish you and your families’ a safe, happy and prosperous New Year in 2015.
When you travel for business, you can spend a lot of time staring at the walls of your hotel room. While travelling in June of 2014 I came across Martin Hogg’s YouTube channel and his switching layout – Brett. Martin has built one of the best operating layouts for a small space. 8 feet long and 1 foot wide it packs in plenty of switching while allowing short, focused operating sessions that you can set up and run any evening without a lot of effort.
Martin’s Videos
Here’s Martin’s first Video:
In November 2014 Martin posted another video:
In November I was lucky enough to catch up with Martin; I wanted to find out what had been his inspiration and focus for designing Brett.
Designing Brett
Previously known as Dreary, Martin’s layout has been renamed to Brett after a recent revamp. Still set in Idaho in the early 80s the layout is at the end of a branch line, now under the ownership the Yellow Pine Railroad (YPRR). Essentially a run-around loop, with industries off each end of the loop and an interchange track, trains enter from front right and loads are spotted at industries according to the crew’s switch list for that day.
Martin says that his attention has wandered recently and that the railway had taken a backseat to other modelling interests. “I decided to re-vamp the shelf layout. I have various plans brewing for another American one, but I decided to try to get some more out of this and I have to say, so far it is working.” The layout is essentially a loop with sidings.
Martin says that “there was no room to have a traditional staging or fiddle yard”.
“The track at the front right acts as the ‘interchange’ or in/out track.”
Operating Brett
Early on in the design Martin decided that “there was little point in creating an illusion of ‘somewhere else’ as this layout wasn’t going to be leaving my spare room. So the front track acts as the on-scene staging and provides the start and end point for the game play.”
The loop in front of Smith & Hogg’s track can contain a maximum of three 50 foot cars, Northwest Lumber can handle 2 cars, and Farmers Co-Op can handle up to three 50 foot cars, while the team track and Smith and Hogg can manage a single car each.
The aim of the game Martin says is not to overload the layout with too many cars. Martin prefers to switch a couple of cars for 30 minutes at day’s end, rather than spend a couple of hours once every now and then. Additionally only having to setup a couple of cars means it is faster to set up and tear down an operating session at the end of the working day.
“I planned to allow 1 loco+2 cars (or 3 cars) as an ideal length for each spur to allow switching moves. The ‘interchange’ or fiddle track at front is the same.”
Industries
There are four industry spots on the layout. From Left to right they are:
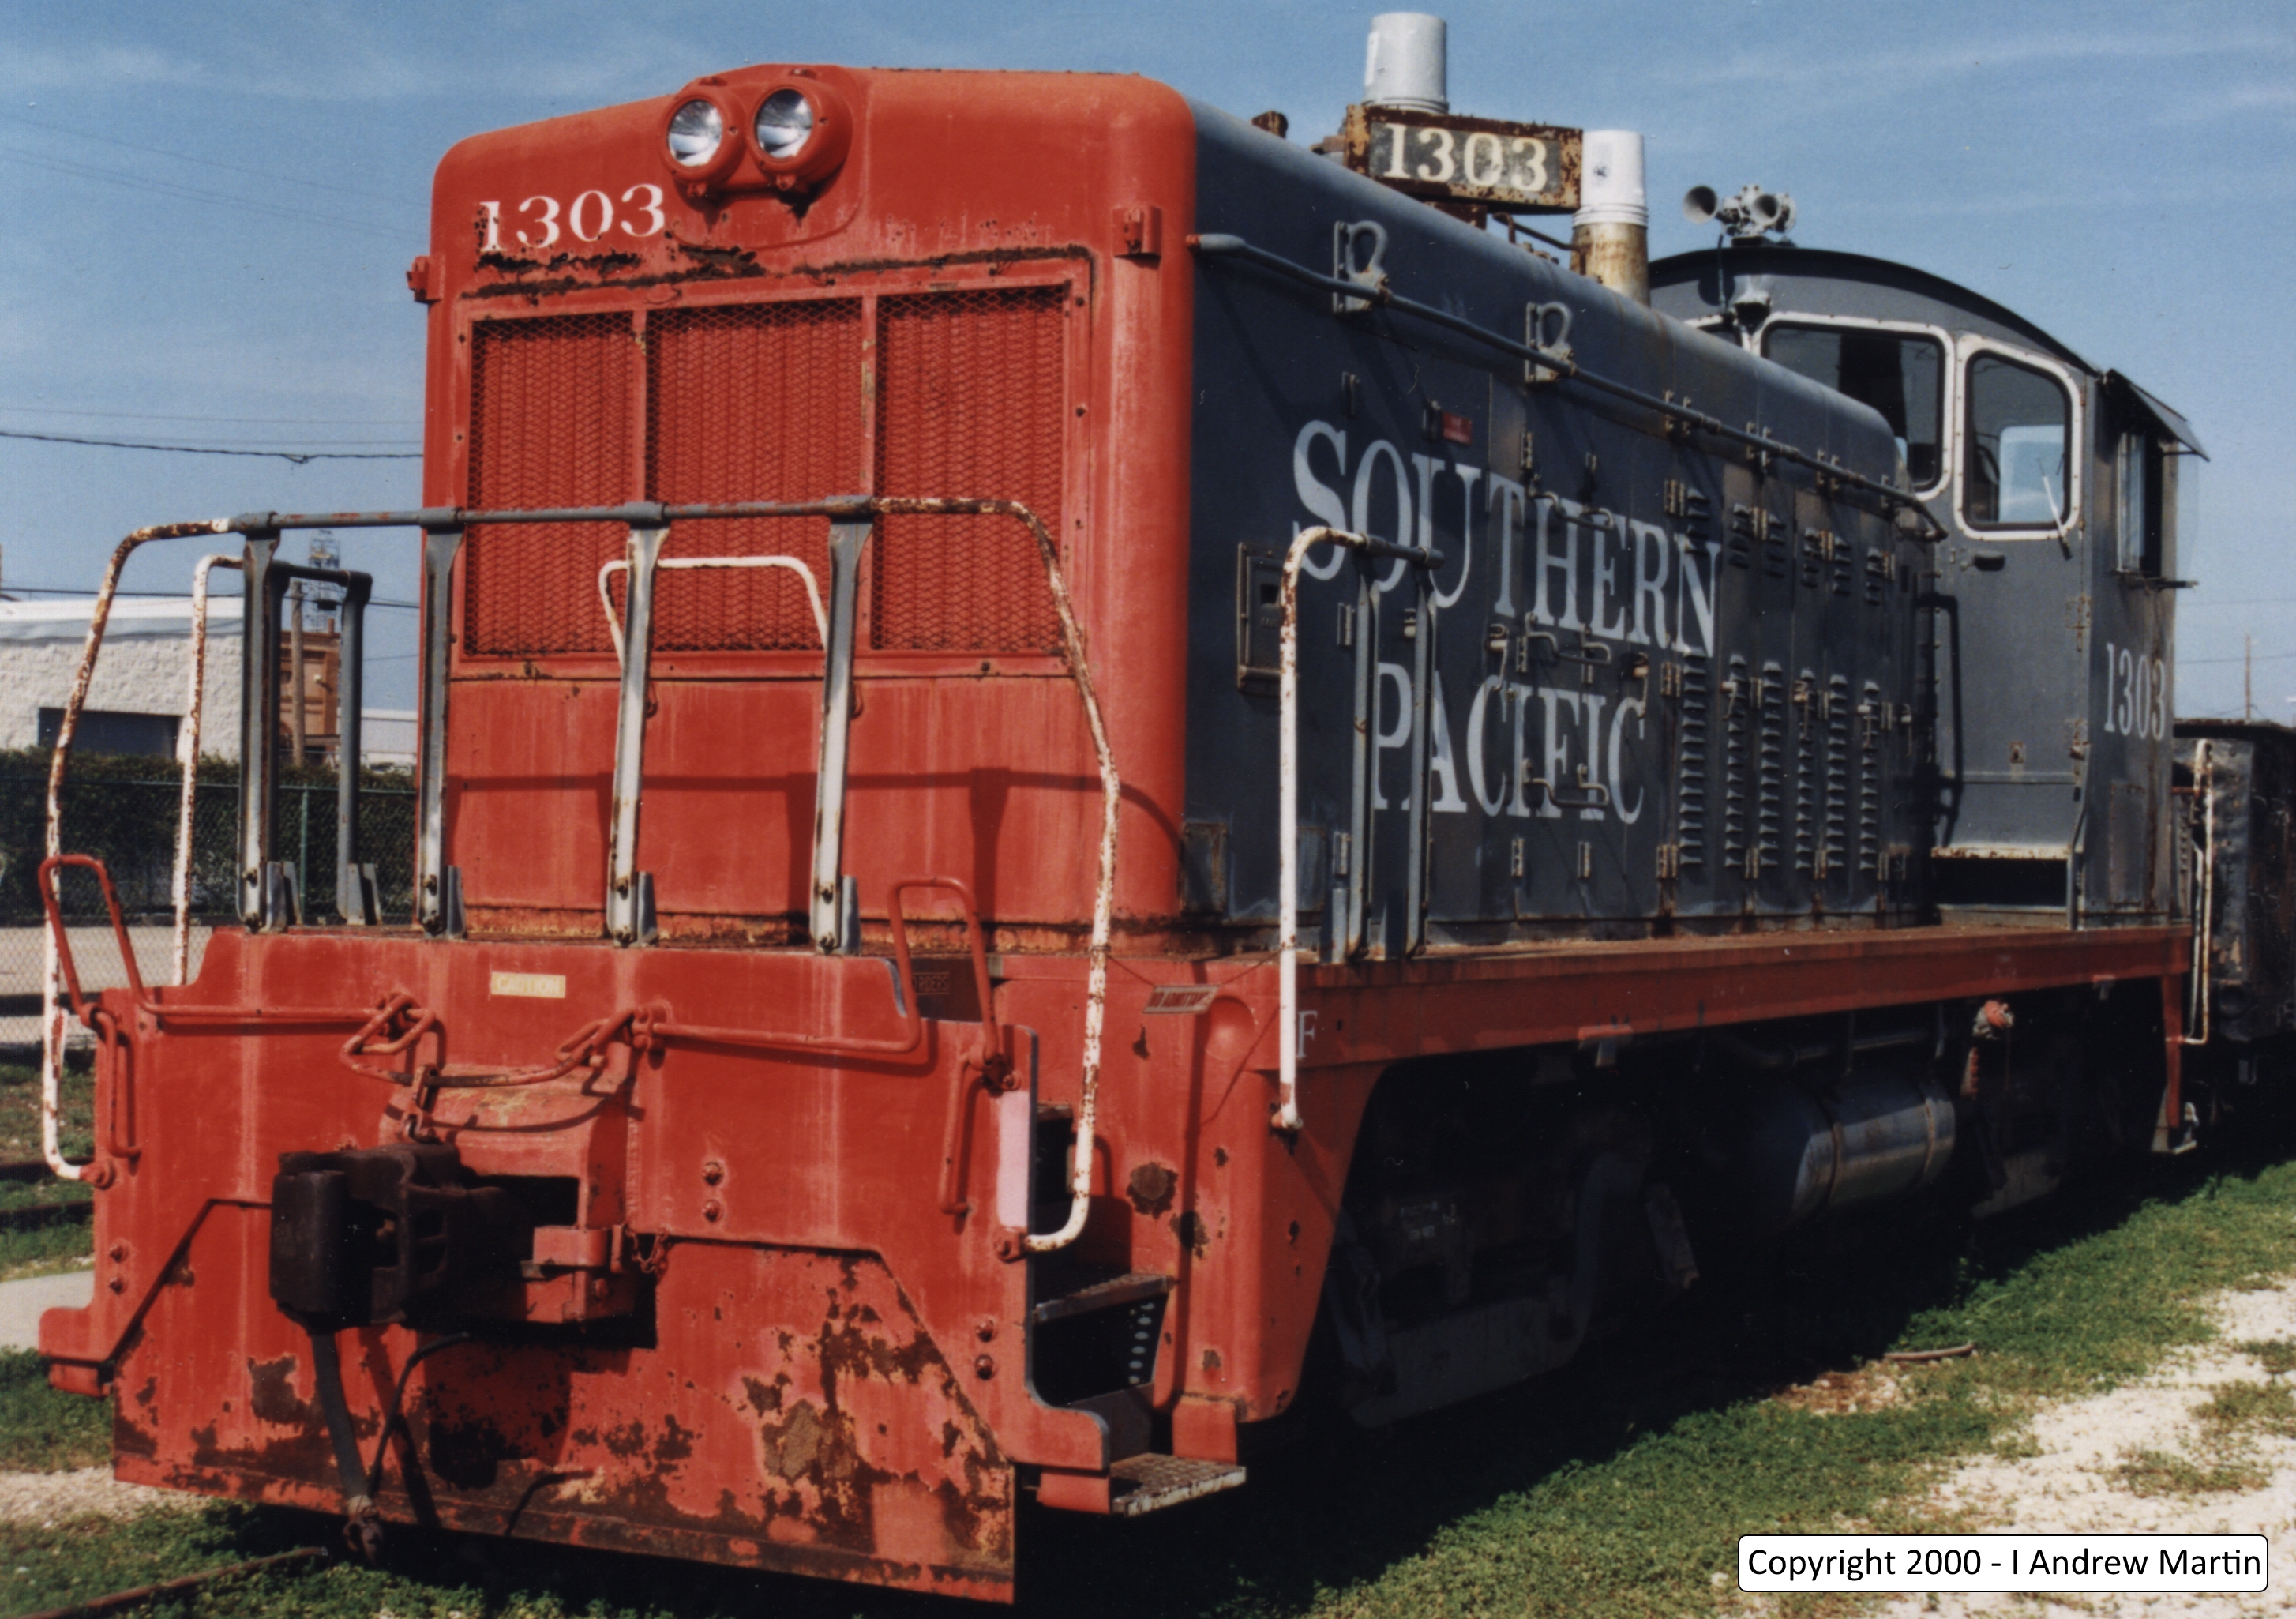
In September of 2000 the family and I took a visit down to Galveston, on the Texas Gulf Coast. Among the great things to view was the Galveston Island Railroad Museum. I’ve scanned some photos I’d taken on the visit of Southern Pacific NW-2E No. 1303.
She was built in June 1949 by G.M.- EMD as # 1925 and when rebuilt in April 1971 became #1303.
She was donated to the Museum in December 1984 and was operable when I visited.
I hope that you enjoy the images. You can find out some more about the museum by visiting their website: www.galvestonrrmuseum.com/
Part 1 – No plan survives first contact with the enemy
It has been some time since I’ve had the funds or the time really to do much of anything in the modelling realm.
I’ve simply not had the funds to bring a lot of the work I’ve had underway forward to completion. Thanks to the Taxman and a payout due to being laid off, I’ve been able to order some extra parts to complete most of my Railbox cars.
The most important of all the parts has been a set of Microscale decals.
I ordered these from Microscale in the US and very quickly in the post I received 3 packets of Microscale (87-1291) HO scale RBOX & ABOX decals. Microscale’s service was fast and excellent after ordering directly from their website. They decal two cars of each type and come with all the car data you need for the cars.
I have a lot of these cars to re-work; at last count I believe about there were 10 in total. I have enough to cover 6 cars for now. With my layout that I’m building (currently set in 1978) there’s latitude for the Hunter Valley to have bought some similar per diem boxcars. These cars I’ll complete last as I have to produce or manufacture my own decals for them.
Updating the Athearn Blue Box model
The Athearn model is, except for the roof pattern used, correct for the XAF10 series cars. The kit does not have the detail that modern-day kits come with as standard, but they were only $7.50 when I bought them and even after the upgrade process will top out in real dollar terms at less than I can buy the newer models for now. To keep the costs down I’m making most of the add-on parts. To be fair I love scratch building. It has always been my favourite part of the hobby.
Let me say this before the rivet counters jump in: I know that the roof panels on these cars are wrong, I can live with that. At the height above the floor the new layout will be, they really won’t be all that obvious,even if they may be easy to see.
When money is tight these simple upgrades make all the difference. What other issues remain I can live with. There are some issues though that I just cannot live with. In order of descending importance they are:
Trucks – I replace these on all of my Blue-Box cars. In this case they’ll be the 70 ton roller bearing trucks (fully equalised) by Kadee. I love these trucks, and with proper weighting they run like a dream floating along and bending to the poor track of the HVL (we are a ribbon in the weeds kind of Shortline you know). At around A$15.00 per pair they are not cheap, but they work so well I’ll eventually fit them on my entire fleet as I can afford to.
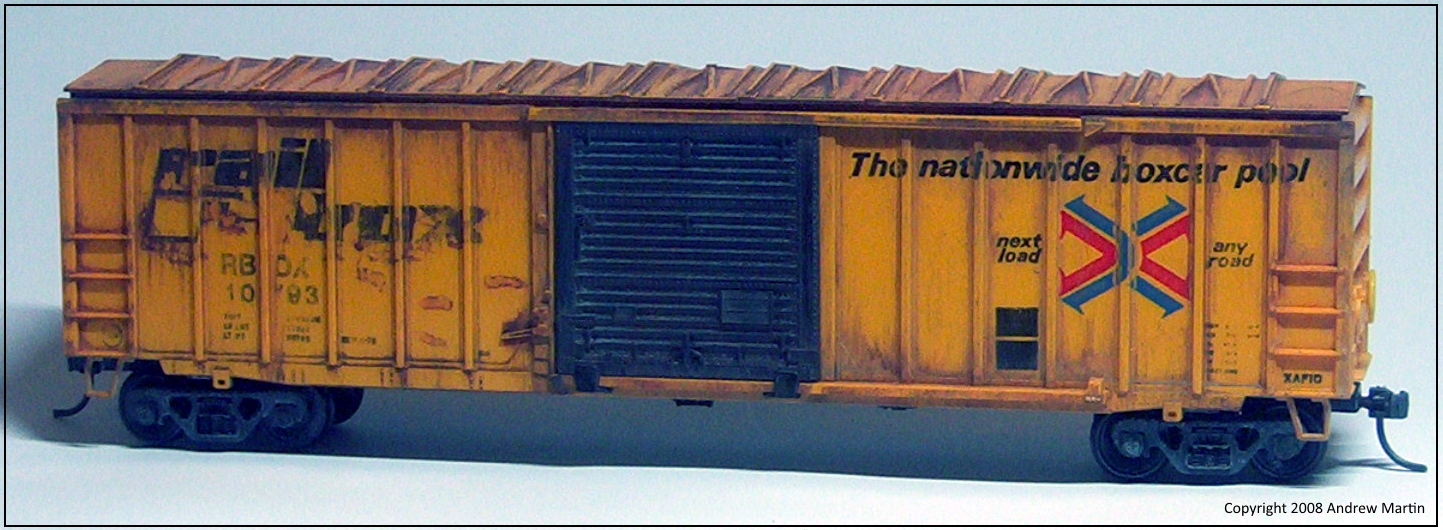
The body side the grab irons just irk the hell out of me; moulded onto the body side and just begging to be milled and replaced with brass wire – the image below shows the experimental car with these.modifications. While the grab-irons on this model look over sized I am certain that once they’re painted they’ll stand out a lot less. If they don’t then I’ve since sourced some really fine brass, and if they aren’t fine enough I can always get some fine copper wire, tin it and then fit them for prototypical accuracy
The stirrups on the car ends are OK, but I can do better using brass wire, brass strip or as shown in the image above good old-fashioned staples (which have proven to look great but will need to be drilled, glued and then have NBW castings glued through them and into the body to stay on – every one of them has been knocked off – even with careful handling and using the best super glue)
Updated Kadee knuckle couplers (I prefer the #58 which have a much finer head casting). From these I’ll be removing the magnetic glad hand as I do all of my uncoupling with a skewer, and because I’ll be adding air hoses and glad hands (these magnetic units which look really great as you can see in the YouTube video below. They are now available from P.W.R.S. at: http://www.pacific-western-rail.com)
Remember how I said no plan survives first contact?
If I were a purist, or a glutton for punishment, I could rework the car ends. There is much that could be done by milling the ends and cleaning everything up and starting again. I just can’t be bothered. The ends are good enough, and because they’ll be in between other cars, and generally not focused on I’m not going to worry.
The coupler box used on the model is wider that the real one used on the real car, but again, this is between the cars during normal operation and really, I just don’t think it matters. I’ll live with it.
In part 2 I’ll provide a historical context to the build, and then in part 3 I’ll move on to reworking the basic car into something better for your railroad, and mine.
As someone with little space, and limited funds to put toward layouts, I am always looking to find that next great small layout idea. With my role at work coming to an end unexpectedly this week, a small lower cost layout is even more important than ever. While spending some time getting to grips with redundancy I was idly looking at image sites when I came across the Progress Rail facility in Waycross Georgia.
It is a great little facility that has storage for the locomotives coming in to be worked on or scrapped, and then a couple of simple buildings for work to be done. The layout of the track is very simple too. I’ll post updates on this post with additional images once I’ve completed the work on the images.
I opened a new Operations section to the blog today. This is from an old site and has been moved and updated to reflect changes made in the last 4 years.
You can get to the section from the main header – look under the Yard Office and then choose operations.
Originally Posted on the Old HVL blog March 24, 2013
OK, so a little about the design and build of the layout boards.
In general all wood is fine quality pine dressed all round (DAR). The board top is 12 mm ply (1/2 inch), while the sky board is 6mm (1/4″) ply. THe legs are “L” girders using 1×2 and 1×3 DAR pine glued and screwed on the along their length. At the base of the leg is a glue bock of 2×1 DAR pine which is used to locate a T nut, with a 5/16″ bolt as a leveller. The nut for the 5/16th bolt mounts on the top of the glue block locking the bolt in place once you’ve levelled the board. I’ll be building a better foot arrangement at some point in the future that is easier on the floor, most likely a wooden ball with a 5/16″ nut through the centre of the wooden ball.
All of the side and end rails are 3 x 1 DAR pine and these have not been glued, but have been Kreg pocket screwed together. The ply was then glued and screwed to the box. Nice, tight and very rigid. There is one rail across the board in the centre of 2×1″ DAR pine, this has also been Kreg pocket screwed to the sides and the top was glued and screwed tothis also. The skyboard is glued and screwed to 1×2 pine DAR which acts as a stiffener and mounting point on the back of the main board. Mounting to the rear of the main boards is achieved using Kreg pocket screws.
The legs are mounted to the main board using 3 screws on each side to the sides. The top horizontal board bears the weight of the main board above; while the bottom horizontal board acts as a bearing face between boards and allows the boards to lock together using a wooden clamps from offcut of the hozontal boards and 1 x 2 DAR pine. Think an inverted U locking the two legs together. Nice, tight, simple and about 3 months in the planning.
Overall what are my impressions? Very happy to be over the hump of the work. The boards are light and strong. I can lift them fork lift style on my own without hurting myself and as I have a 50 year old back; this is a good thing. Thanks to my wife (Janette) for suggesting the mounting height for the sky boards. At 400mm above the plane of the board they are high enough to be at or just below my eye height, and with the 2×1 stiffeners behind allow easy mounting of lights that will hang out over the board for better simulation of daylight.
I’ve a few sketches and such to put on the gallery site later in the week. This should give you an idea of how the parts look. More photos will be coming before I paint everything later this month or during April, depending on the weather. Well a great day in all, now some remedial work on the old boards to bring them up to spec and height, and then my work is done.