If you’ve not heard of Adrian’s site before then you are in a for a treat. This site has everything that you ever wanted to know about shunting puzzles, including the Timesaver and the Inglenook.
Image courtesy of Adrian Wymann
Of interest for those of us thinking of building a layout using the Inglenook design is the discussion on the design of operation and movement for the layout. Additionally there is the mechanics of designing and building the layout also. Very well worth the look.
Putting the Inglenook to work Adrian’s great little layout deserves a look. Well designed, well executed and well presented Adrian walks you through the design and build process and provides a lot of insight into the process.
Image courtesy of Adrian Wymann
Head on over to the websites and do a bit of reading – you’ll not be disappointed.
First we need a little context before we get to the layout’s brilliance. As a Western Sydney boy, I regularly saw long and short freights during the 1970s come through Blacktown in Sydney’s west before and after school. Living in Marayong on the Richmond branchline we had regular freights to and from the Riverstone Meatworks, and further up the line to Richmond itself.
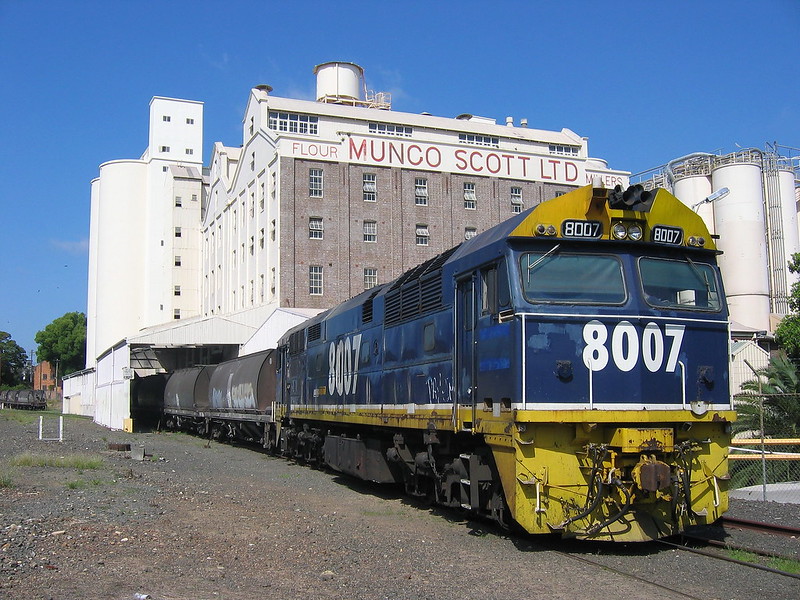
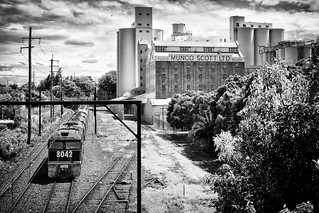
In the inner west (when I could wrangle a train trip into the city) I saw several locations that I always thought I’d like to model. The Mungo Scott flour mill siding for one as shown below seemed ideal. It was inner-city, working class, railway grit that has had me fascinated all my life. Here’s two examples from that location.
Image courtesy of Rob Cook
Image courtesy of Trent Nicholson
So now that you have a visual context of the type of layout that I’d always wanted to build let’s take a look at Ben Gray’s vision of inner city railway industry in a small space (not that you’d notice).
Image courtesy of Ben Gray
The image above caught my eye immediately. First, I loved seeing these 46 class electric locos working freight and passenger traffic around the Sydney network. Designed for heavy freight drag work out of the Sydney basin and over the ranges to our west, these locomotives were built by Metropolitan-Vickers and its partner Beyer, Peacock and Company in England for the New South Wales Government Railways. For many years these were the most powerful locomotives in Australia with a one-hour rating of 3,780 horsepower (2,820 kW) and the ability to deliver more over short periods. They are to me the most beautiful locomotives (electric or diesel) built and look fantastic on this Inglenook (if only there were overhead wire – sigh).
There are some very clever uses of visual trickery here. The layout is just an Inglenook but it is so much more because the focus is not on the Inglenook; rather the focus is on the concept of the viewer’s experience of the layout. You have to be an inner city kid, who saw locomotives similar in appearance, doing what locomotives do with freight cars. And how it worked on me. Good one Ben and well done on taking me back 30 years with one photo.
Enjoy another view of the layout. Follow the links above and if you’re a Facebook user head on over to the group and join in the small layout love. Finally see if you can work out some of the clever tricks used in the design of the layout.
Now for a little more 46 class locomotive weathering porn (model first, prototype last):
The reason the Inglenook is such a popular subject for small layouts is simple: it works on many levels to enable operations. Today let’s look at one recently found Australian design.
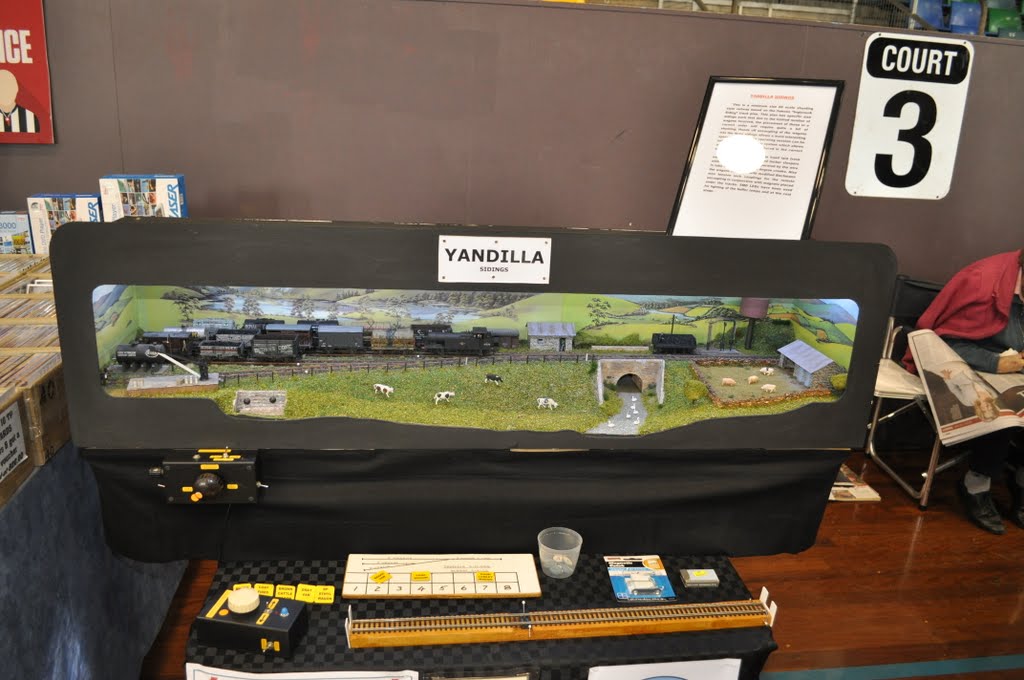
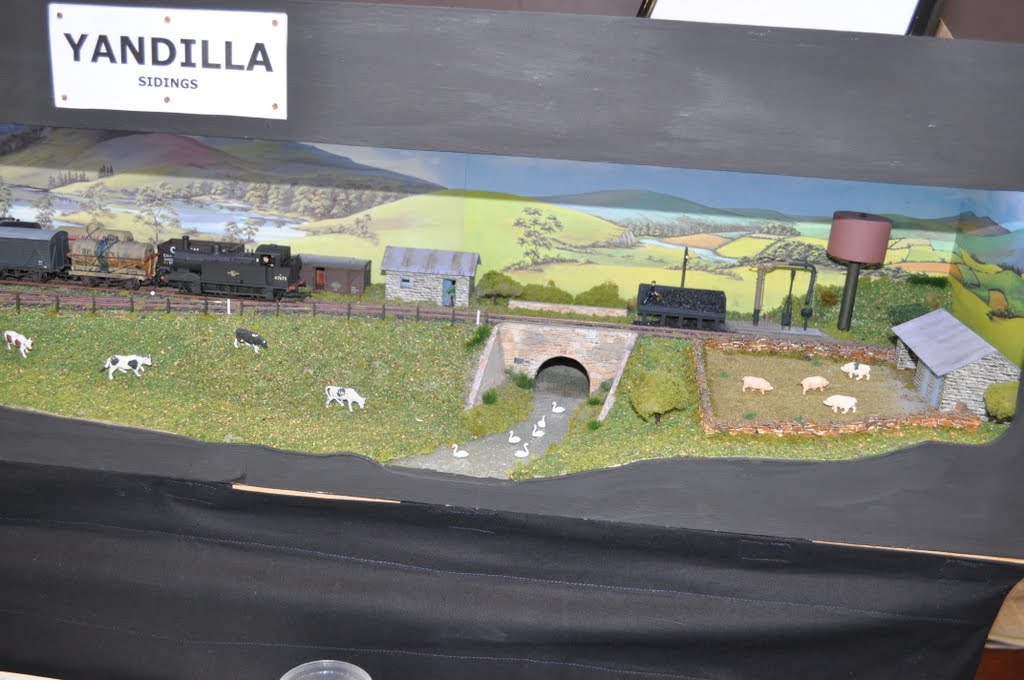
Captured and photographed by David Bromage at the Gold Coast Model Train Show in or around June 2016 at the Carrara Indoor Sports Stadium this layout shows what can be achieved in a small space with great presentation and attention to detail.
Image courtesy of David Bromage
In this overall image you see the entirety of the layout. What it shows to me is that you can have a small layout (in this case with UK prototype trains) that keeps the interest of the viewer and the operator, allows interactivity between the viewer and the operator (and should you choose to do so) allow the viewer to become the operator.
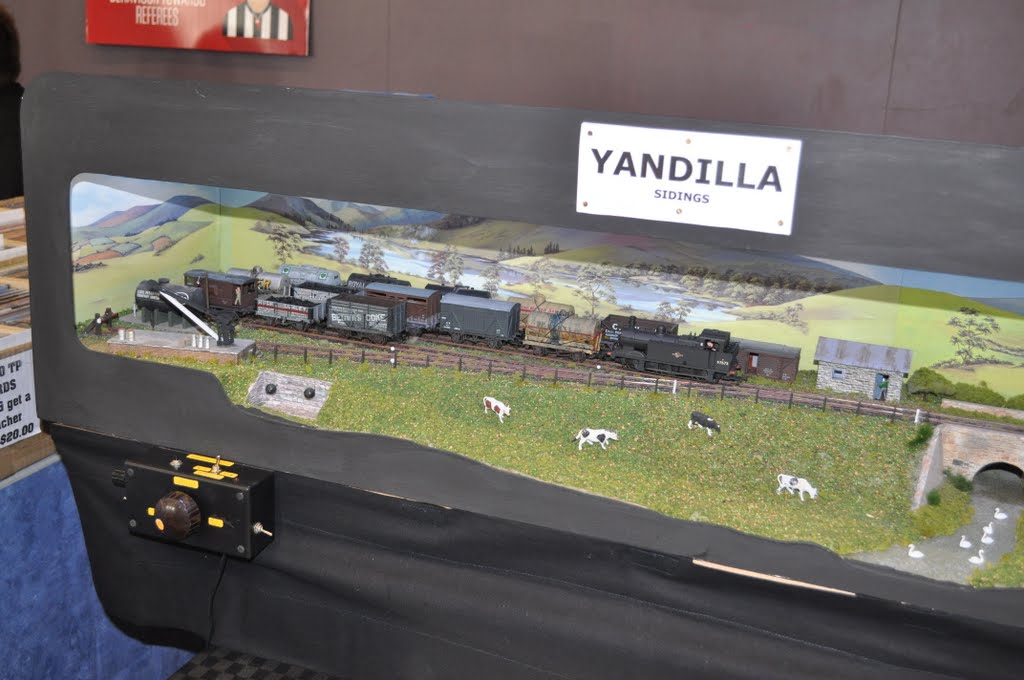
Image courtesy of David Bromage
In addition you can build the layout board and case quickly, with little effort if using pre-built (Ikea style) components. Then you can go to town on the detail in the viewable scene. If you want more than you can add more into the scene, or as the operator has, show the operating scheme to the public at large.
Image courtesy of David Bromage
Using the link in the heading above will take you David’s portfolio for the exhibition. I hope that you enjoy looking into this scene and learning as much as I have from it. I’d like to build an Inglenook in HO for exhibition use this southern spring and summer. I have several layout ideas for an inglenook and a Supernook – who knows what we’ll end up with!
I’m putting out a call for help to all of you today.
I’m having the biggest issue when trying to get to the Tichy Trains website. I’m wondering if others may be having similar issues. I keep getting connection errors and I’m wondering whether others outside of the continental USA may be seeing the same errors?
Here are the errors (occurring across all browsers)
This site can’t be reached. The connection was reset.
Try: Checking the connection - Checking the proxy and the firewall
ERR_CONNECTION_RESET
Just so you know I am in Australia and am not blocking or otherwise filtering content out through my firewall. I used to be able to reach the site. It is only recently that I’ve had issues reaching the site.
I’m wondering if anyone else has found this issue and found a solution for it.
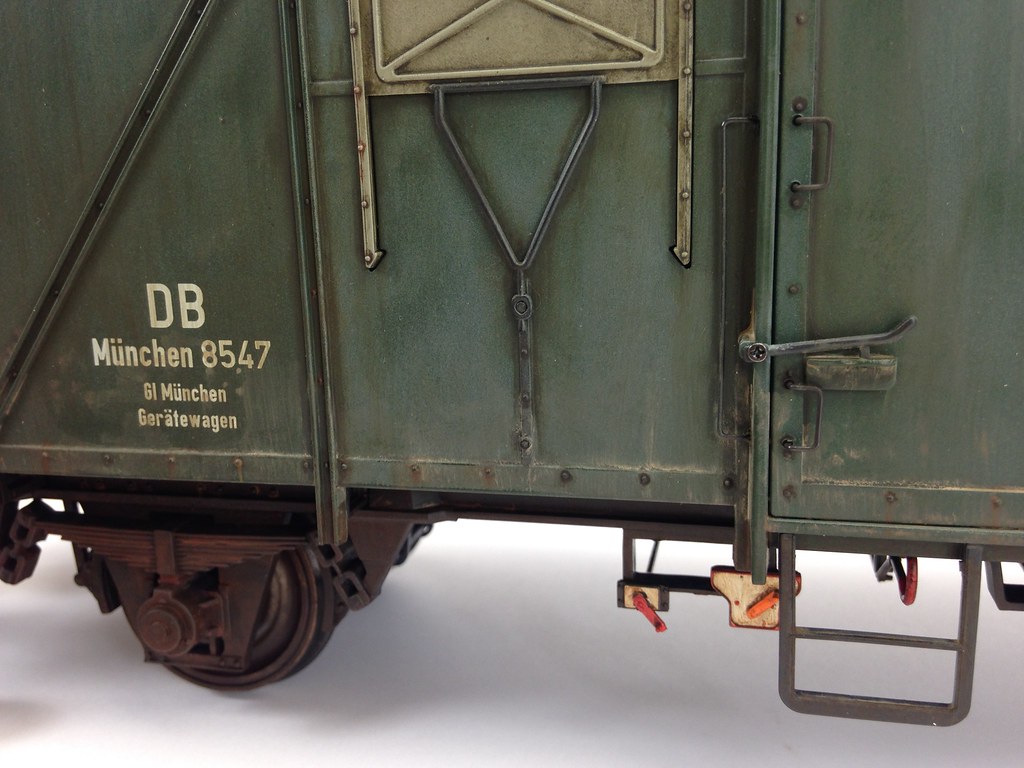
If you’ve followed the blog for any length of time, or know me personally, you’ll know that I don’t like clean things (my personal hygiene excepted). Every model I touch ends up weathered to one degree or another. And so onto todays sites of interest.
You should not need to be a member to view the posts. Definitely to post or reply though. Lots more pictures in what is now a 6 page post by Martin and those of us following him. Not to be missed.
August is the month where year 12 high school focuses on getting elder children ready to complete their schooling and head off to life or to University. This month we’ve toured possible University campuses to see what is on offer and where she can look on planning to attend next year.
Last weekend was an out-of-town visit (120km away) next weekend there’s another University visit on (only 3km away this time). All too soon she’ll be moving out and living on Campus (but don’t tell her that). Finally I’ll get my half of the train room! Anyhow – on to today’s sites of interest.
Tom Conboy’s layout’s shown in all it’s glory on the Model Railroad Hobbyist site. Tom writes on the first page: “The Wetterau Food Services Micro Layout was completed in February of 2016. Layout planning and construction began in 2014. I am enjoying operations on the layout, and wanted to share the steps I followed in building this micro layout here on MRH. I have learned quite a bit in building it, and hope you will find it informative.”
Head over and take a look through his shared build log. It is very interesting and a great looking layout. What’s not to like – a 70 tonner runs through it.
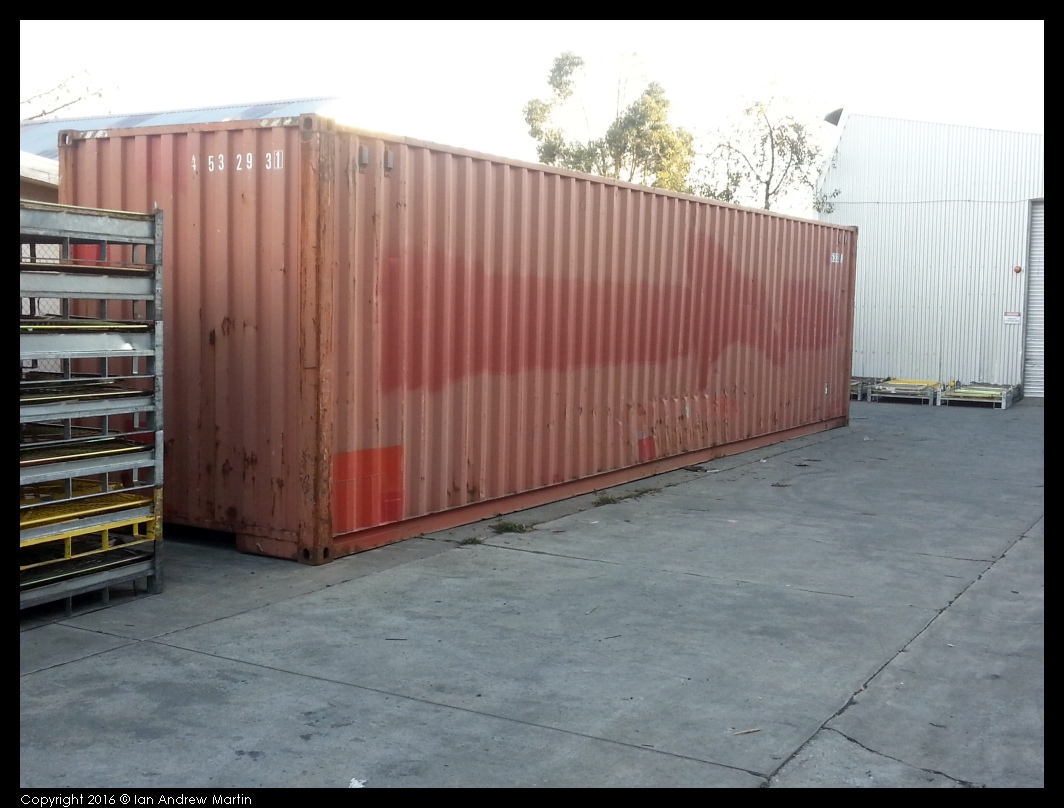
I’m slowly working to catalogue and curate all of my railway and modelling related images. I’m doing this in part so that I can share them all with you here; also to allow me to find the photos I need for modelling when I need them.
While the site is in French, using Google translate allowed me to get a better understanding of the content. Visually I find this layout a stunning, well thought out and executed ISL. I hope that you enjoy it too.
My son Ewan got into Warhammer 40K 3 years ago, and while he has been slow to pick the game up we’ve worked together to complete the models and getting them ready for paint.
Among the things I’ve noticed is that gamers are great scratchbuilders. So today I have four outstanding tutorials for you to look at – all from the same site.
A highly creative way to make light and sturdy crates of just about any size, using pink foam (or any foam you can get your hands on). A great tutorial on how to and why to make crates Rob’s way.
It is amazing what Rob can come up with. I’d not thought to use this technique to model the pipes so often associated with our model railroads. Another great tutorial and relatively cheap to boot compared to some of the pipe kits I’ve seen available.
Another simple to do, but hard to imagine (at least for me) tutorial on how to make stairs. With a full step by step style Rob takes you through a start to finish on how to custom make and fit the stairs for the model.
An innovative use for what normally I’d struggle to use, thick cardboard. What a great idea it turns out to be. I’m looking forward to using this on some new dioramas I have in mind and for a new layout idea I have in mind.
This tutorial is a two-for, that is you get to learn how to make stone walls and assorted stone wall pieces and you get to model the corn field. Once again some really interesting techniques and outcomes. Highly useful for those of us modelling anywhere in the midwest, or even Texas.
As you tool around the web you come across some interesting and useful sites. I’ve found it hard to have a simple to find and use repository since the end of basic HTML coding. I’ve bookmarked and so on but I wanted to have a better place to go.
So today I’ve added a new section for these resources. I’ll add site links when I find them; adding information about the sites so that you decide their value before you visit them.


 Site 1: Industrial switching layout –
  Site 1: Rob Hawkins’ Hobby Blog –
  Site 2: Rob Hawkins’ Hobby Blog –
  Site 3: Rob Hawkins’ Hobby Blog –
  Site 4: Rob Hawkins’ Hobby Blog –
  Site 5: Rob Hawkins’ Hobby Blog –